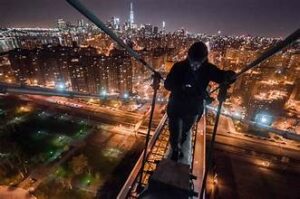
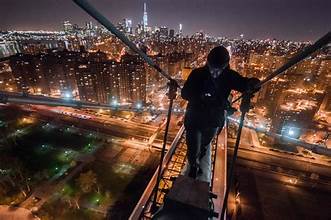
Urban exploration offers a unique opportunity to capture the essence of a city’s hidden gems and forgotten places. However, to truly make your urban exploration photos stand out, leveraging advanced editing techniques is essential. This article will guide you through some cutting-edge editing techniques that will elevate your urban photography, ensuring your images are both captivating and of high quality.
1. Start with a Strong Foundation: Capture High-Quality Raw Images
Before diving into editing, ensure you start with high-quality raw images. Raw files retain more detail and offer greater flexibility during the editing process. When photographing urban landscapes, pay attention to composition, lighting, and exposure to create a strong foundation for your edits.
2. Utilize Advanced Color Grading
Color grading can significantly impact the mood and feel of your urban exploration photos. Advanced color grading techniques allow you to enhance the overall look of your images by adjusting hues, saturation, and luminance. Tools like Adobe Lightroom and Capture One offer extensive color grading options, enabling you to create a consistent color palette that complements the urban environment.
- Split Toning: Use split toning to add color casts to the highlights and shadows of your photo, giving it a unique look.
- Color Wheels: Adjust the color balance using color wheels to refine the tones and enhance the visual appeal of your images.
3. Employ High Dynamic Range (HDR) Techniques
Urban environments often present challenging lighting conditions, with high contrast between bright and dark areas. HDR photography can help you capture details in both extremes. Use HDR techniques to merge multiple exposures of the same scene, creating a final image with enhanced dynamic range and detail.
- Exposure Bracketing: Take multiple shots at different exposures and merge them using HDR software like Photomatix or Aurora HDR.
- Tone Mapping: Apply tone mapping to bring out details in shadows and highlights, making your photo more balanced and vibrant.
4. Enhance Details with Sharpening and Noise Reduction
Urban exploration photos can benefit from sharpening to enhance fine details and textures. However, over-sharpening can introduce unwanted noise. Balance sharpening with noise reduction techniques to achieve crisp, clean images.
- Smart Sharpening: Use smart sharpening tools to selectively sharpen areas of your photo while minimizing noise.
- Noise Reduction: Apply noise reduction filters to smooth out graininess, especially in low-light or high ISO images.
5. Leverage Layer-Based Editing for Precision
Layer-based editing allows for precise adjustments and non-destructive editing. Software like Adobe Photoshop provides powerful layer-based tools for detailed editing.
- Adjustment Layers: Use adjustment layers for color correction, exposure adjustments, and contrast enhancements.
- Layer Masks: Apply layer masks to selectively edit specific areas of your photo without affecting the entire image.
6. Apply Creative Effects and Filters
Creative effects and filters can add a unique touch to your urban exploration photos. Experiment with various effects to enhance the visual impact of your images.
- Lens Flares: Add subtle lens flares to mimic the look of sunlight or artificial lights, adding depth to your photos.
- Textures and Overlays: Use textures and overlays to create a gritty, urban feel or add artistic elements to your images.
7. Consider Perspective Correction
Urban environments often feature complex architectural elements and lines. Perspective correction tools help you straighten and align these elements, ensuring your photos have a professional look.
- Transform Tool: Use the transform tool in Photoshop or Lightroom to correct lens distortion and straighten lines.
- Lens Correction: Apply lens correction filters to correct geometric distortions caused by wide-angle lenses.
8. Optimize for Web and Social Media
Ensure your edited photos are optimized for web and social media platforms. Proper optimization ensures fast loading times and high-quality display on various devices.
- Resize Images: Adjust the resolution and dimensions of your photos based on the platform’s requirements.
- File Format: Save your images in web-friendly formats like JPEG or PNG to balance quality and file size.
9. Create a Consistent Style
Develop a consistent editing style to make your urban exploration photos recognizable and cohesive. Consistency in color grading, effects, and overall aesthetic helps build a strong visual brand.
- Presets: Create or use editing presets to apply your preferred style quickly and consistently across multiple images.
- Profile Matching: Match the color profile of your images to ensure a uniform look across your portfolio.
10. Stay Updated with New Techniques
The world of photo editing is continually evolving, with new techniques and tools emerging regularly. Stay updated with the latest trends and software updates to keep your editing skills sharp and your urban exploration photos cutting-edge.
- Online Tutorials: Follow online tutorials and courses to learn new editing techniques and tools.
- Software Updates: Regularly update your editing software to access the latest features and improvements.
Conclusion
Enhancing your urban exploration photos with cutting-edge editing techniques can transform ordinary shots into extraordinary images. By capturing high-quality raw images and utilizing advanced color grading, HDR techniques, and precise layer-based editing, you can elevate your photography to new heights. Incorporate creative effects, optimize for web, and maintain a consistent style to ensure your urban exploration photos stand out in the digital landscape. Stay updated with new editing techniques to keep your work fresh and innovative


